Tutorial: Basic Content Management
To understand better how the Platformus content management works, let’s use the default personal website sample and add blog feature to it.
There are two ways to work with content using Platformus CMS: using the built-in Website extension and writing a custom one. The first option is suitable when simplicity and speed of development are more important than application performance. It works good for website pages, blog categories, posts, tags etc. The Website extension implements the EAV pattern using the classes and members to describe content, and objects, properties, and relations to store it. Writing custom extension is more complex task, but in this case performance and flexibility are maximized. In this tutorial we will go the first way.
First of all, we need the blog post pages. Each post page should have the same properties as the regular page, but also it needs preview (a small piece of content), image, and creation date. In the Platformus context, all the pages are objects which are described by the classes. Therefore, to create new type of page (and new type of object) we need to create the corresponding class first.
Go to the backend and sign in (navigate to https://localhost:5000/backend/)
and then go to the Development/Classes section. There are already two classes here: Page and Regular Page.
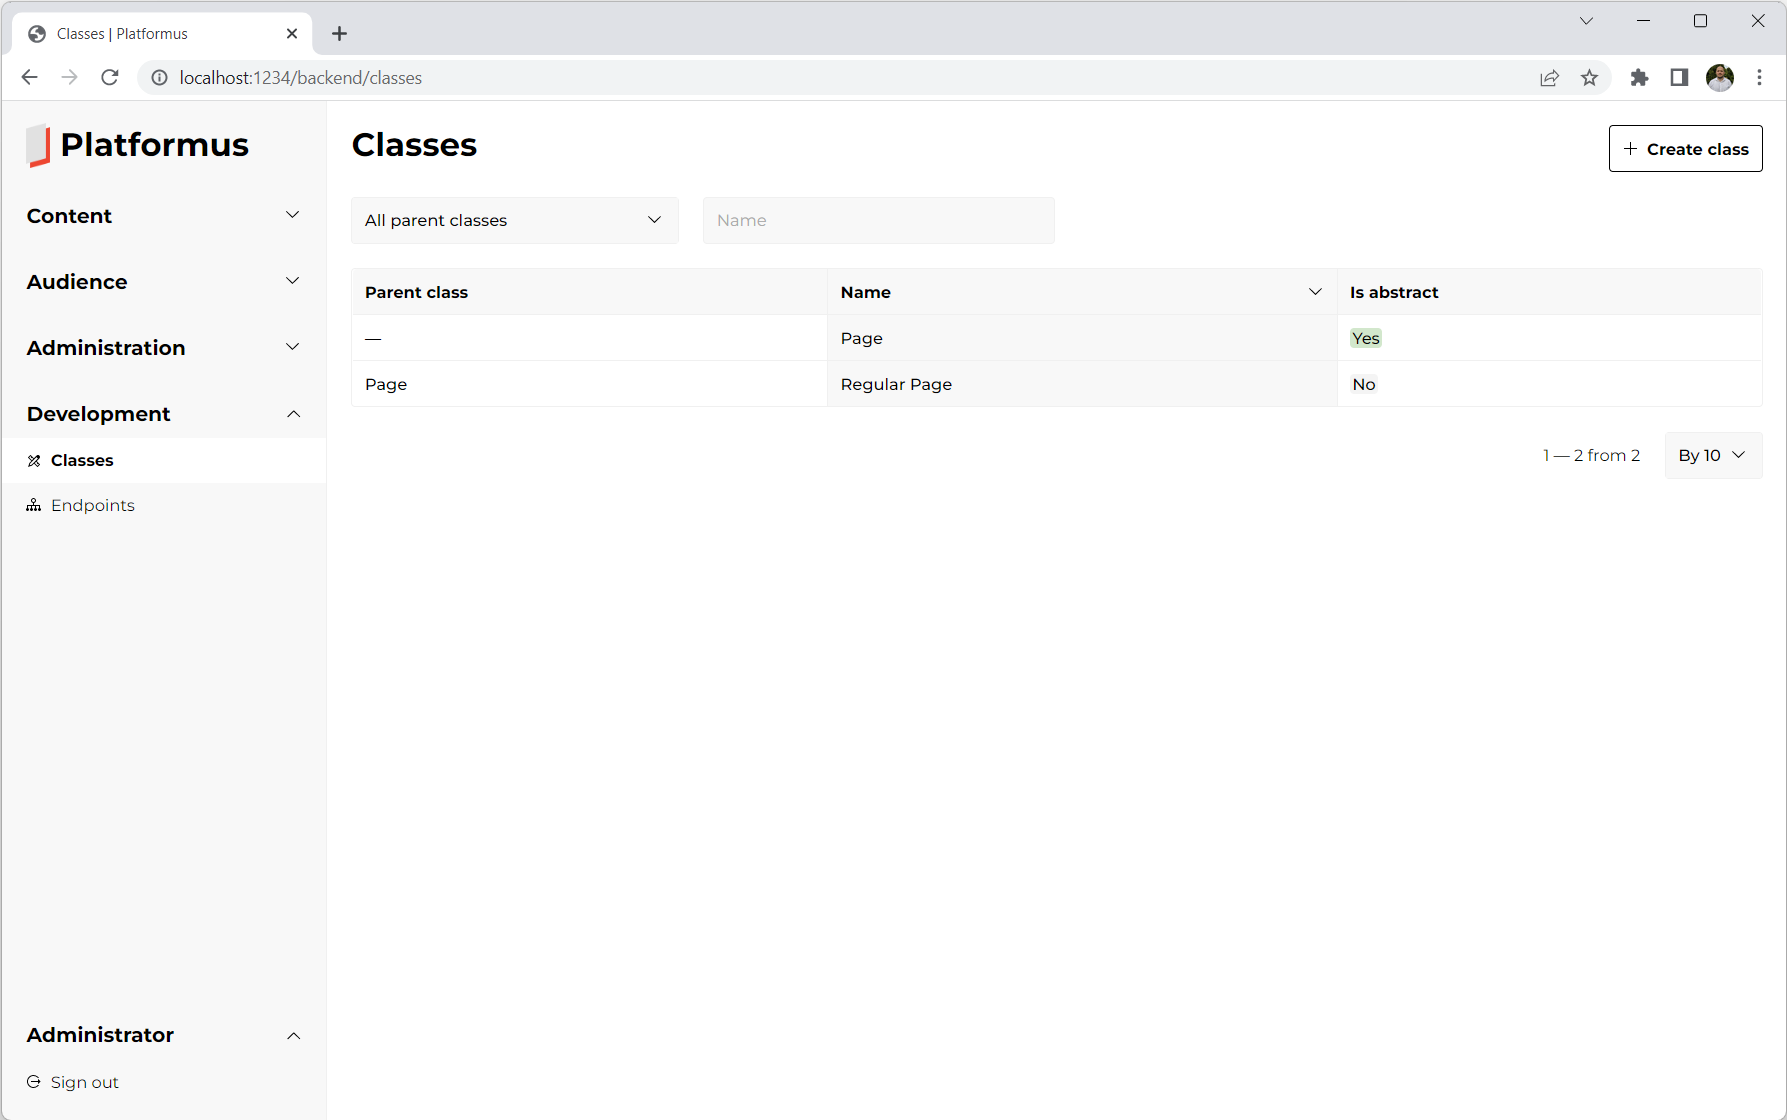
The Page class is abstract, it means that it is used as the base class for the other ones (class copies all the members
of its parent class). Click the Members link of the Page class to see the list of its members.
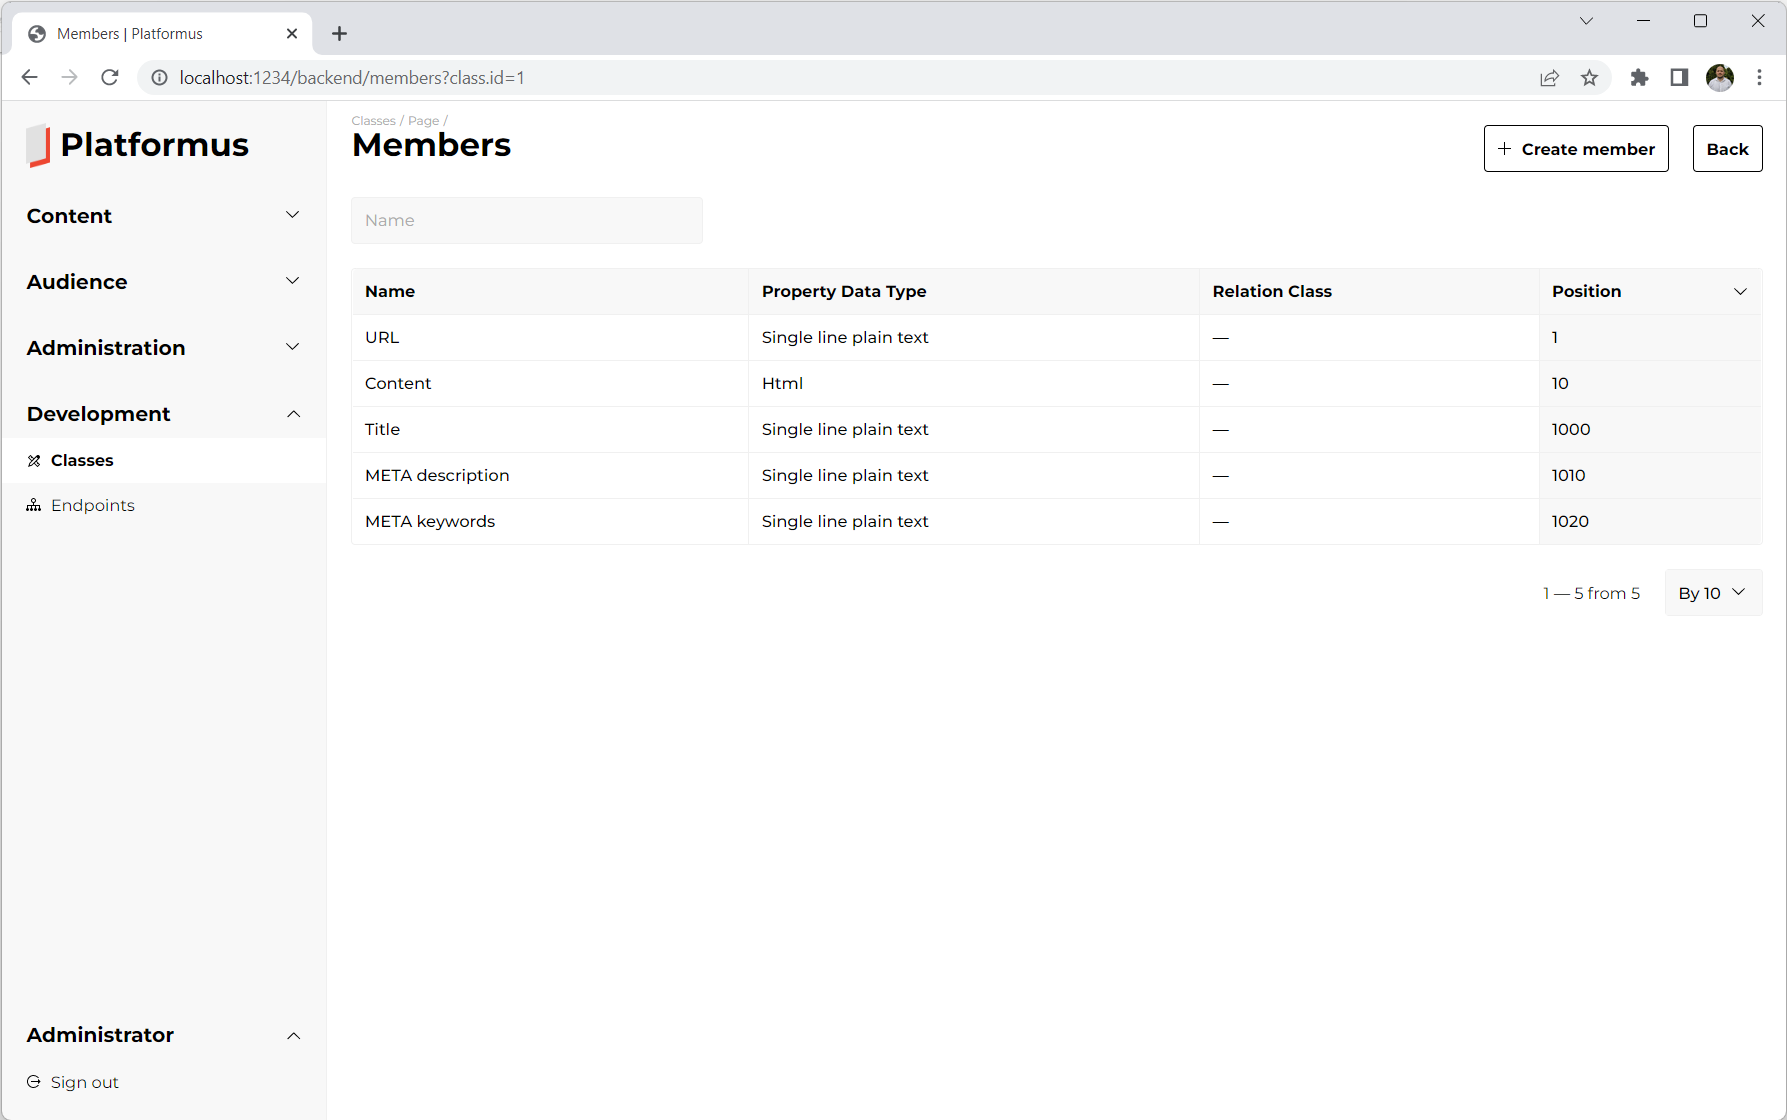
As you can see, there are the standard page properties here, like URL, Content, Title, META description,
and META keywords:
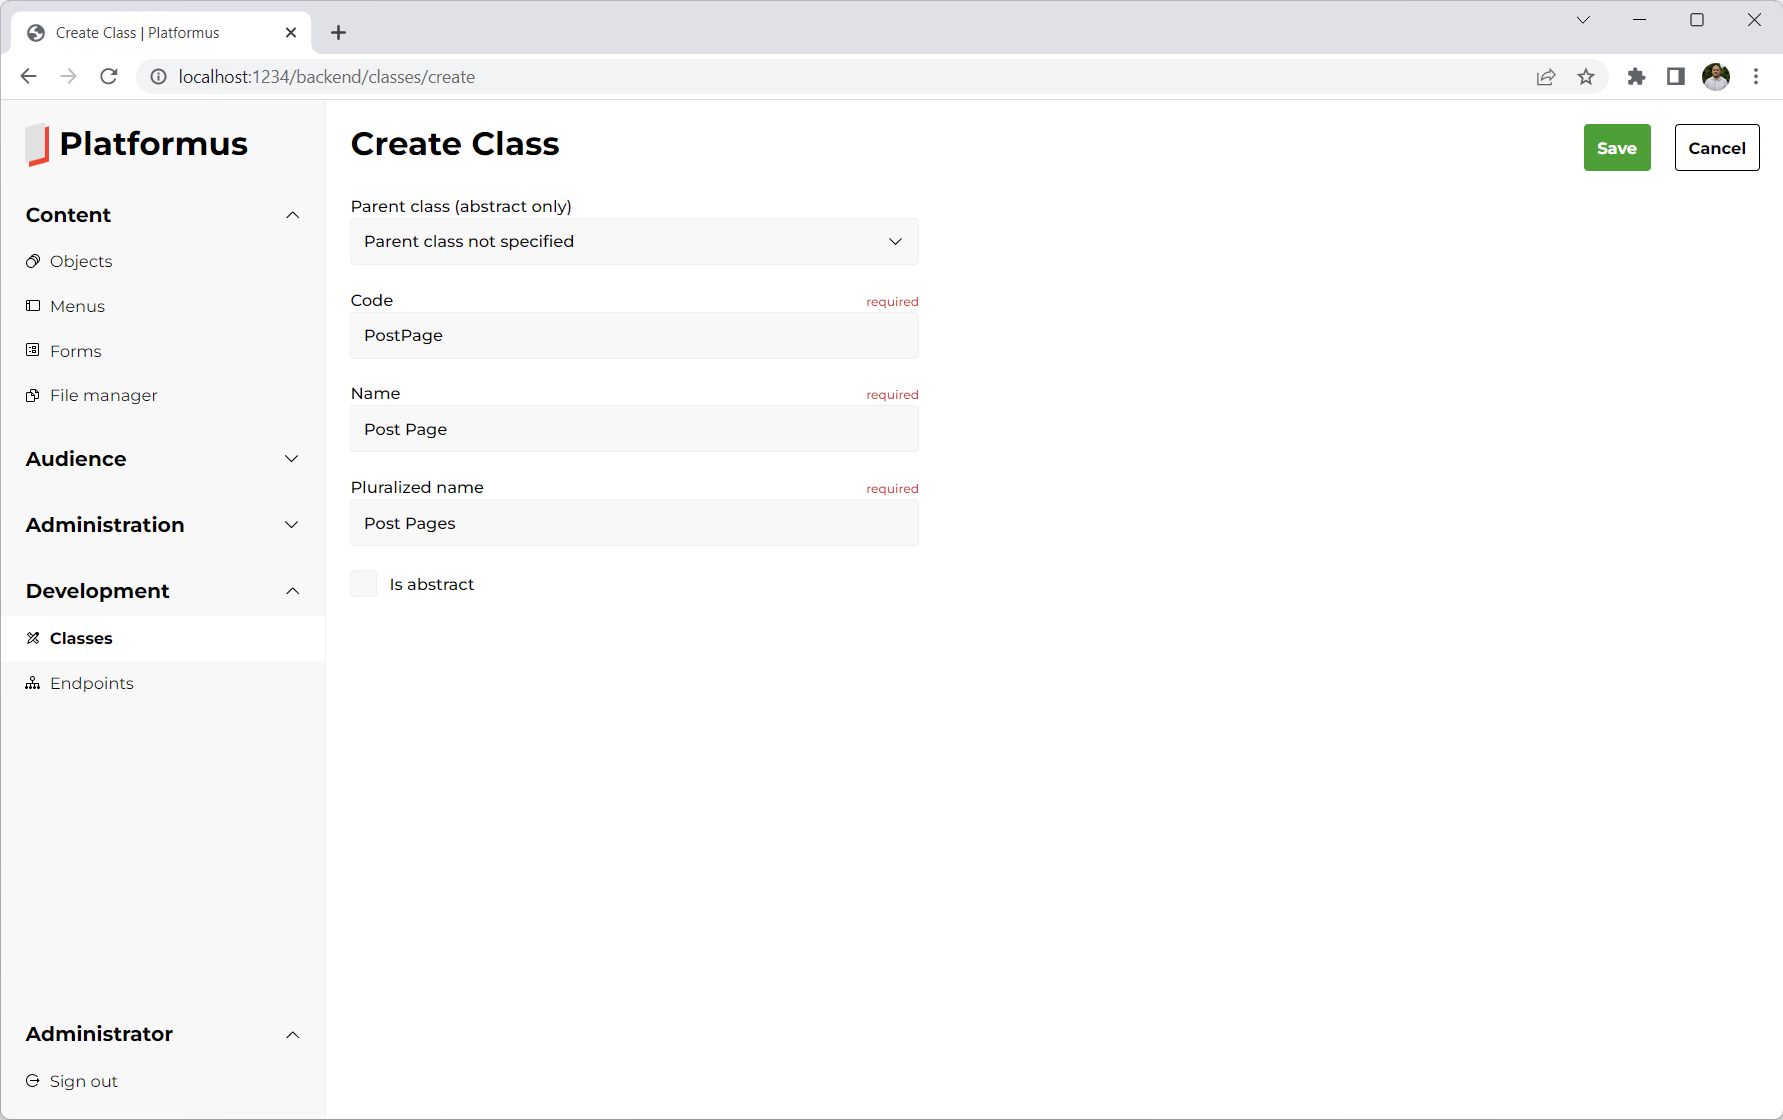
Now return to the class list and click the Create class button. Select the Page class as the parent class
for our new one. Fill the Code, Name, and Pluralized name fields as shown below:
Click the Save button. New class is created. Now go to the list of its members. It is empty for now
(but don’t forget that our class will have all the members from the Page class, because it is selected
as the parent one).
Let’s add the Preview member to our class. Click the Create member button and fill the Code,
Name, and Position fields as shown below:
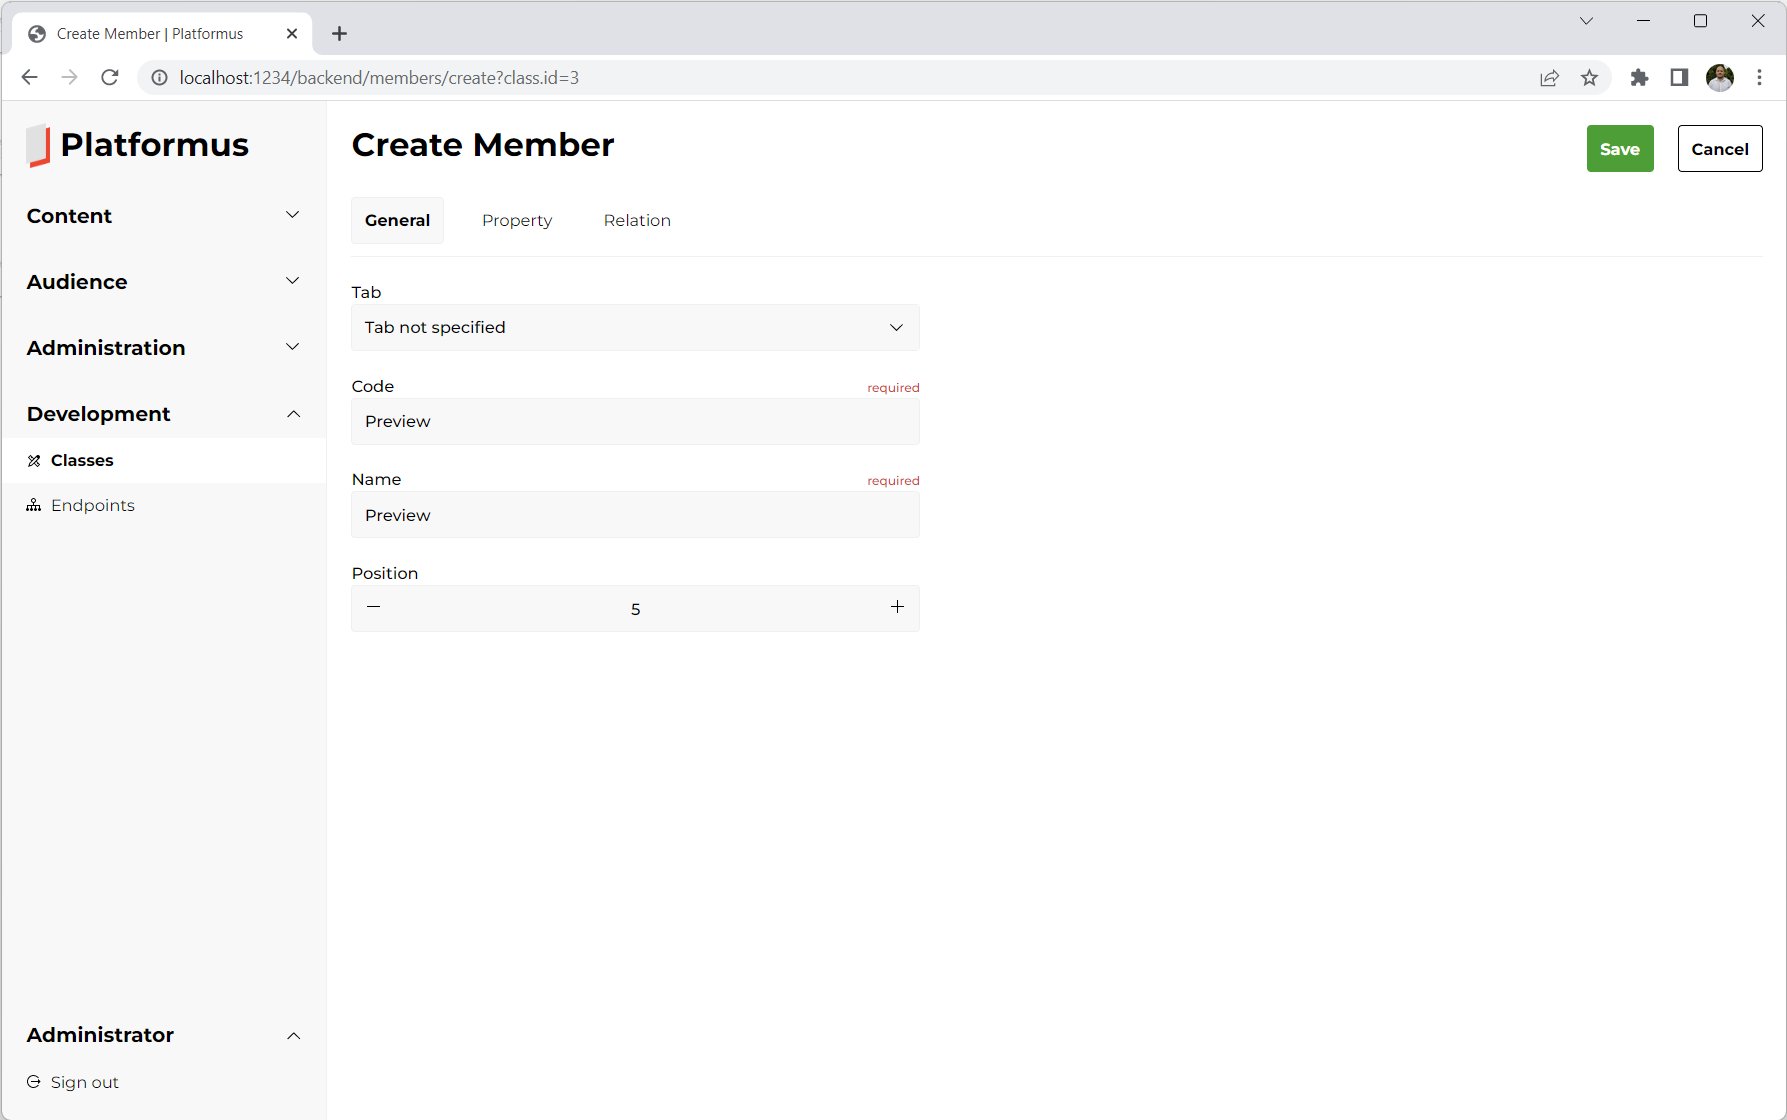
If we had a lot of the members, we could use tabs to group them on the object edit page, but in our case,
we only use it to group the properties that are related to SEO in the parent class. Position is set to 5,
because we want our property editor to appear before the Content property one
(Content member has position set to 10).
Now click the Property tab and fill the fields as shown below:
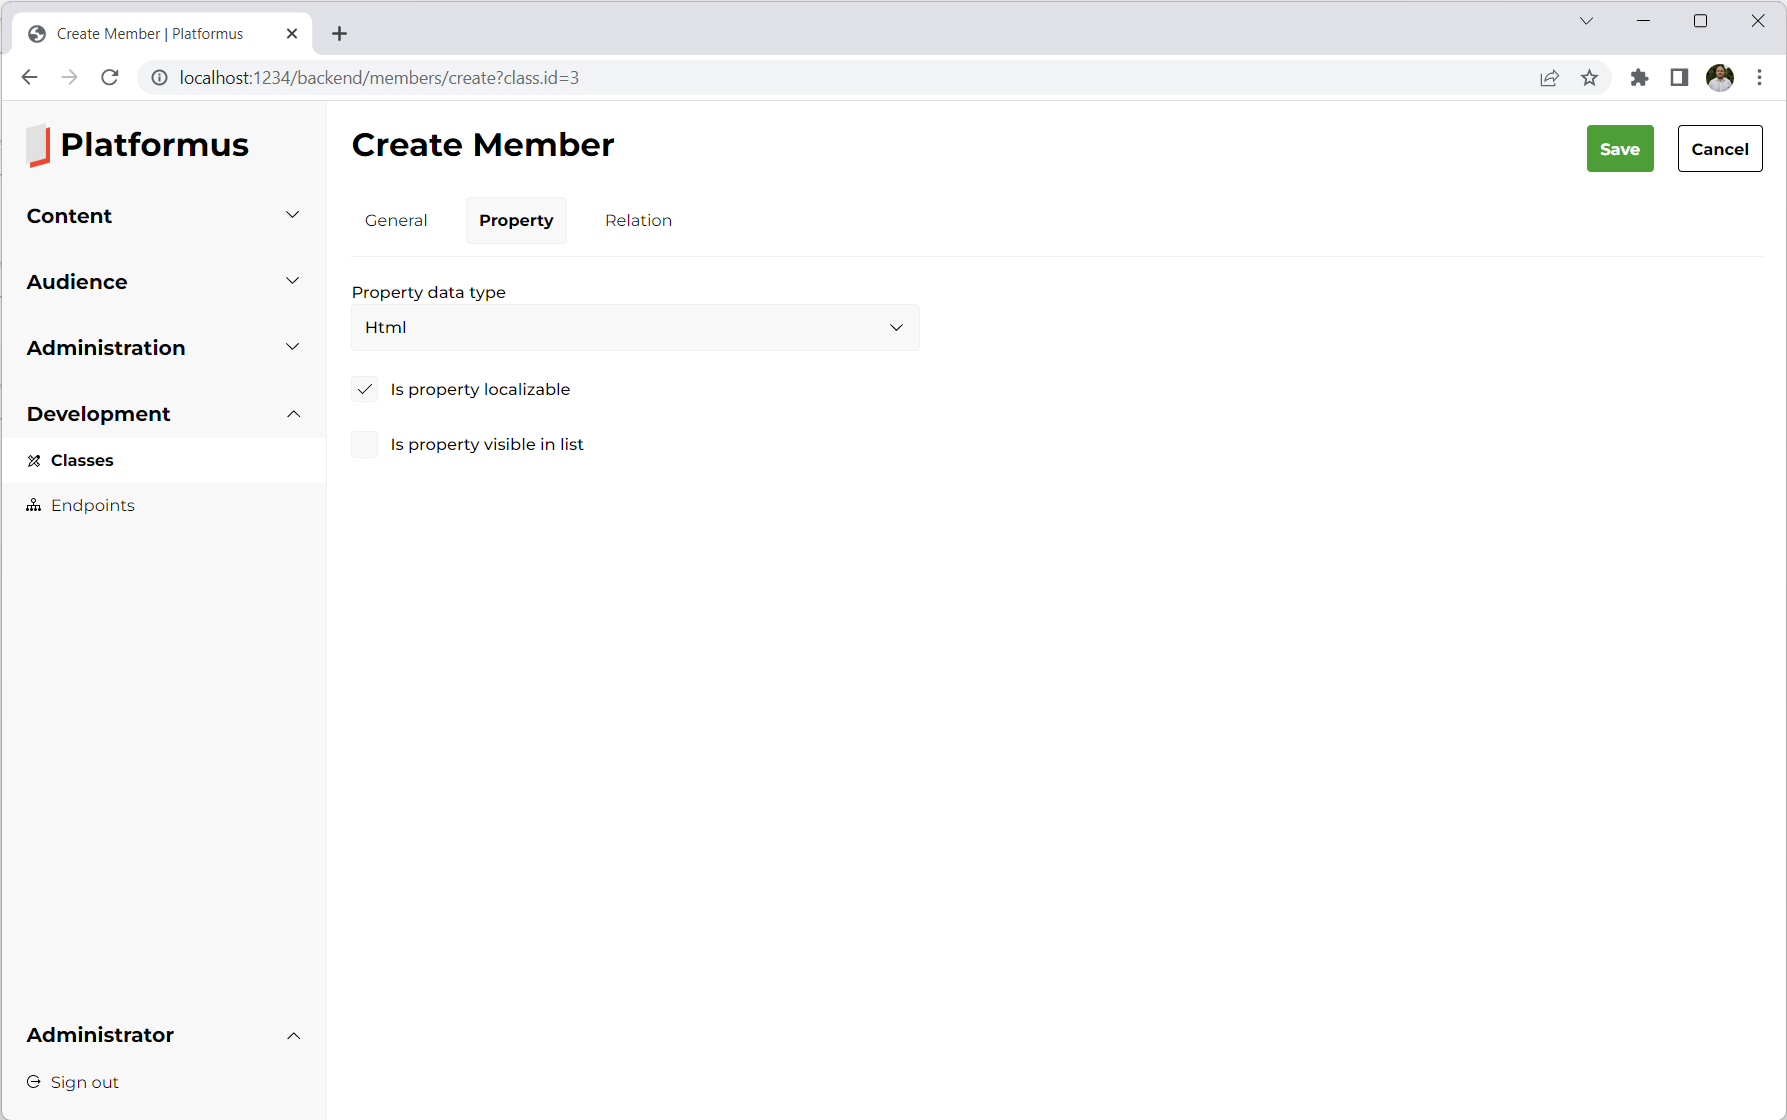
When you change the property data type, the set of the fields on this tab is changed too. You can add your own data types and specify their properties (as well as the client-side editors that are used to edit them). For the properties that have short values we can set the Is property visible in list checkbox, so that properties will be displayed in the object list (we will see that later). Now click the Save button again, our member is created.
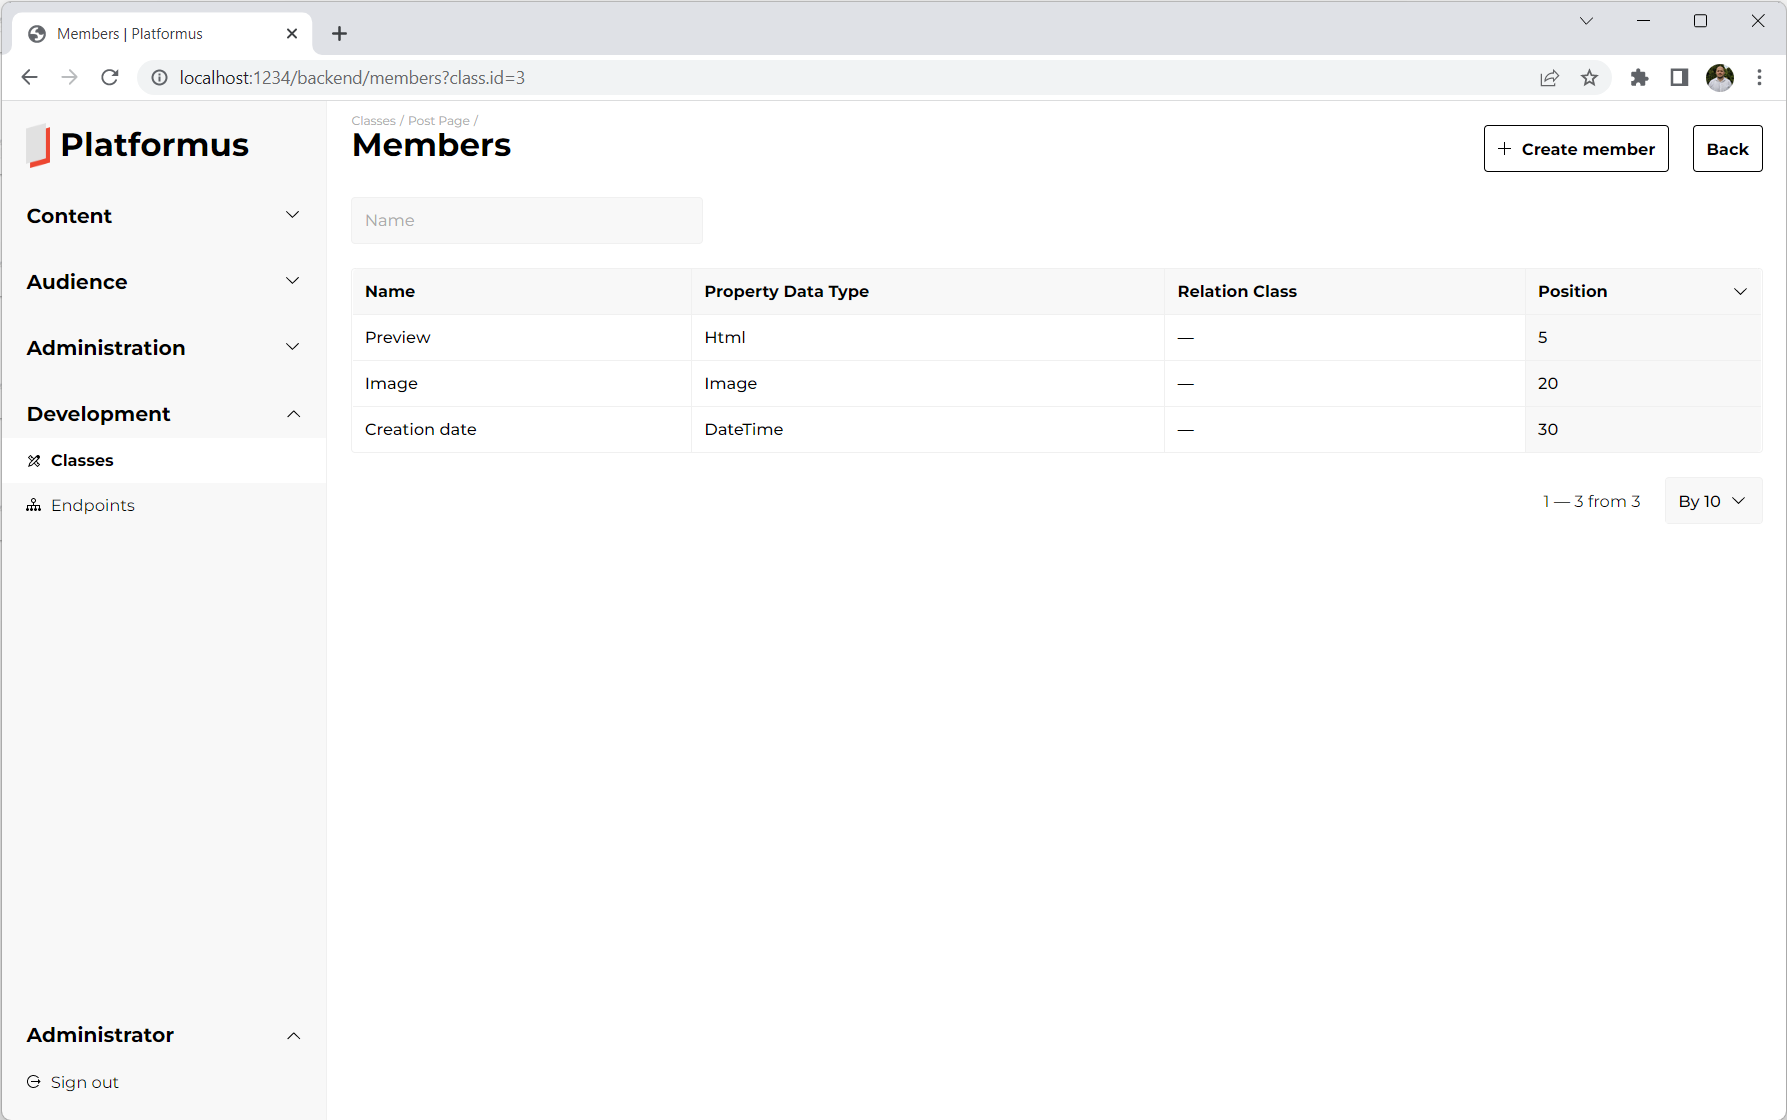
Add the Image and Creation date members in the same way (but select the Image and Date property data types for them).
Our member list will look like this:
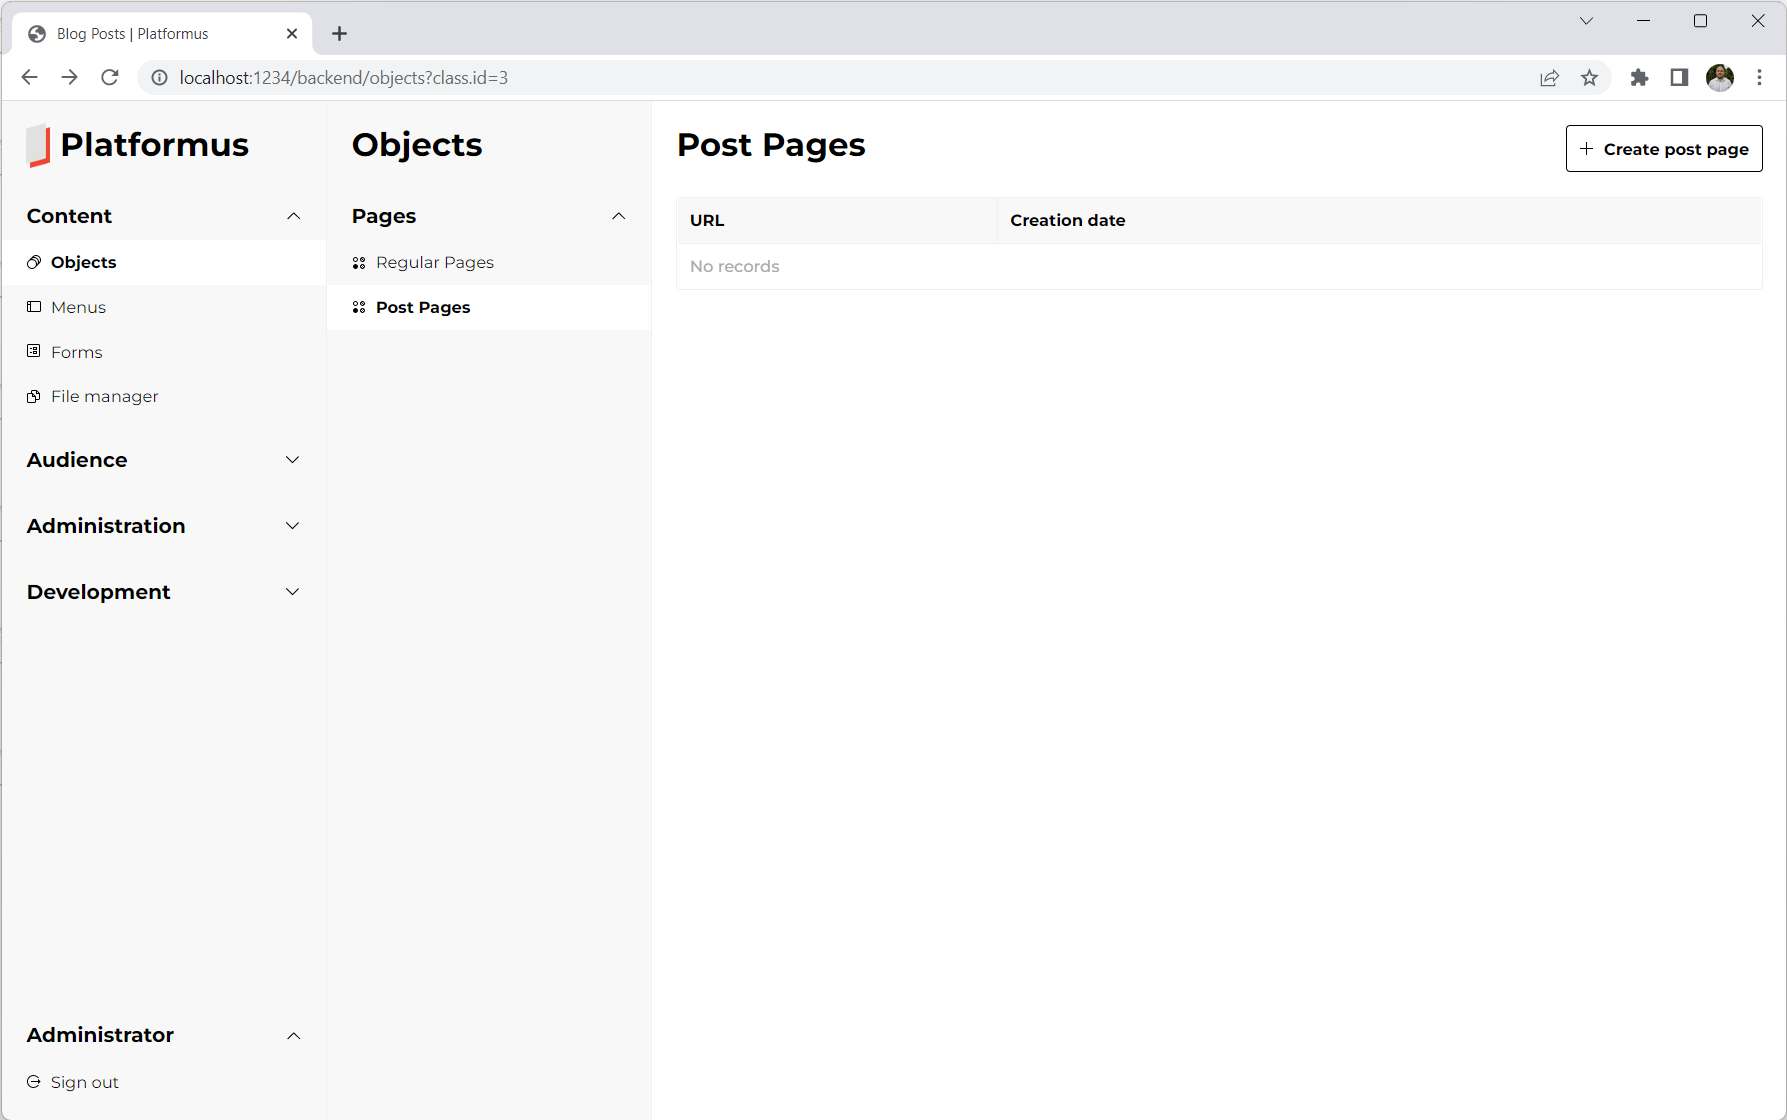
That’s it, we are done with our data model for now. Let’s add some content. Go to the Content/Objects section.
Objects (and again, our pages are objects) are grouped by the parent classes (pluralized names are used to name the groups).
Objects of the classes that doesn’t have parent ones go under the Others group. Our Post Page class is
already here:
Click the Create post page button:
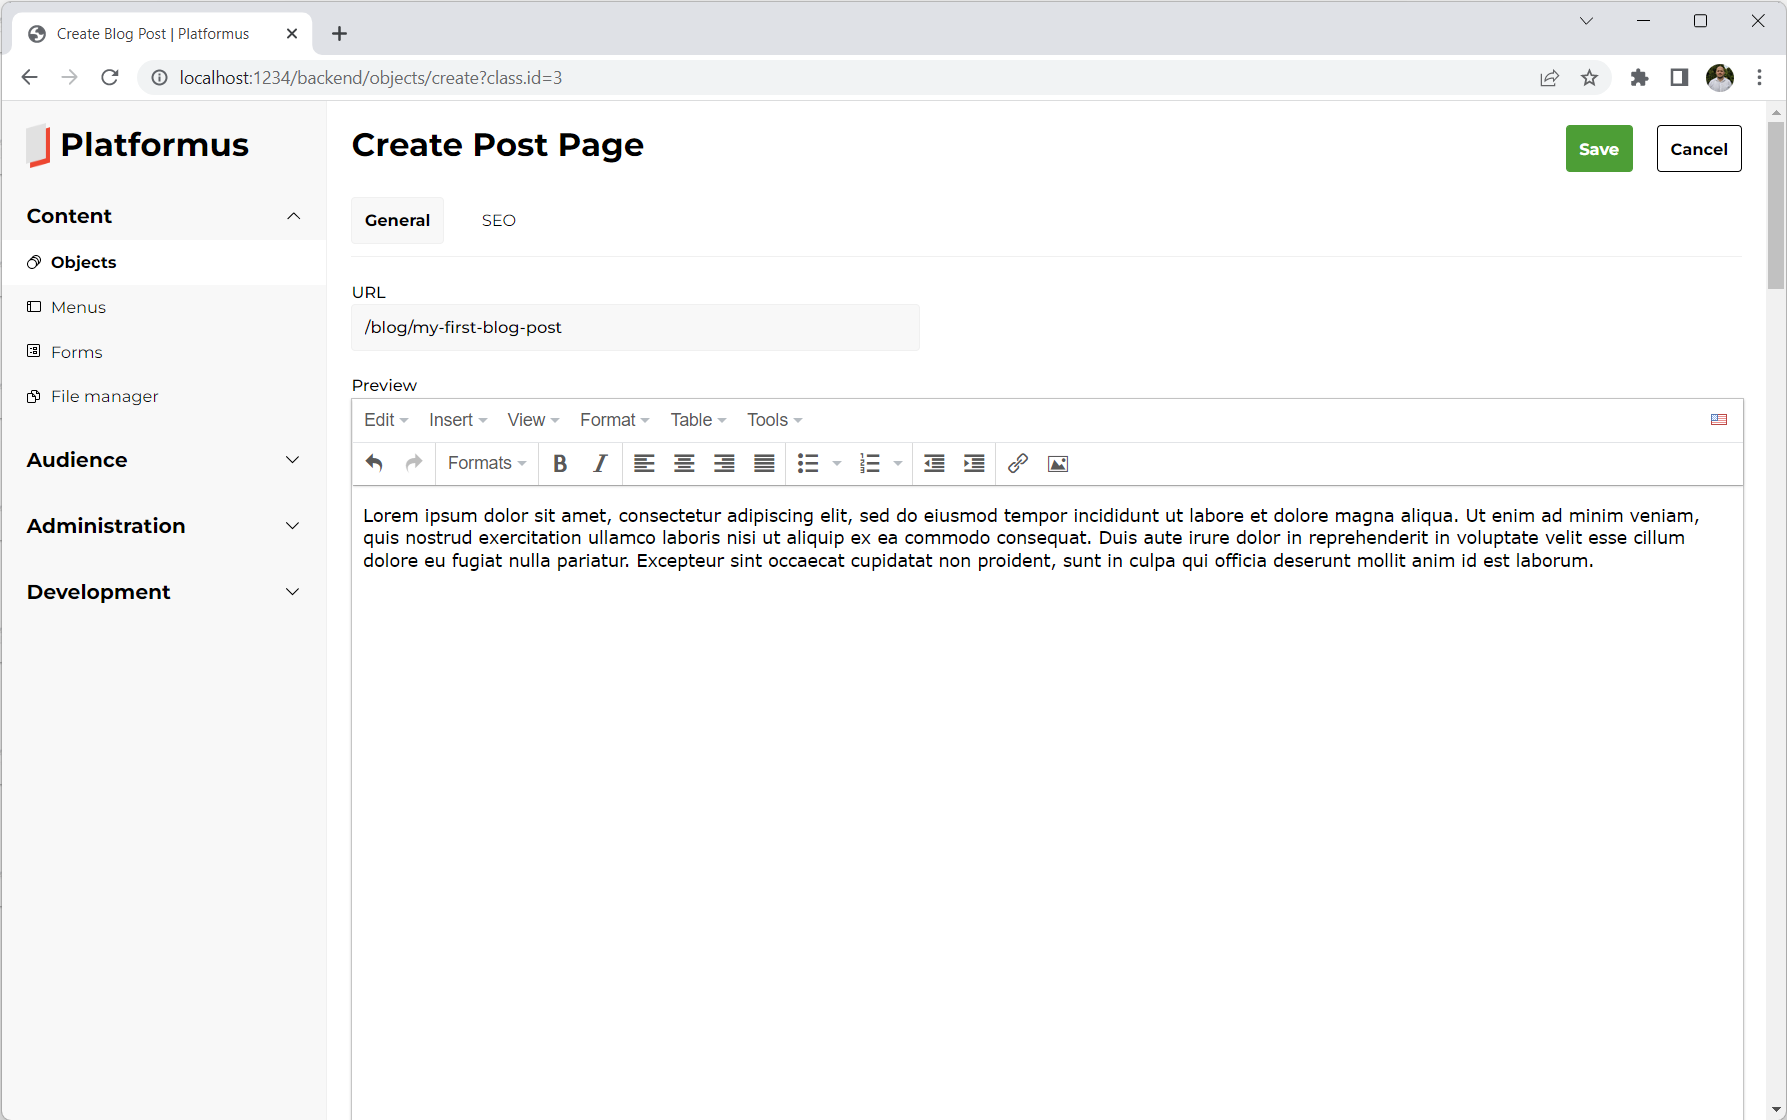
As you can see, all the properties we have defined in the corresponding class are here. Fill the fields and click the Save button. New post is created:
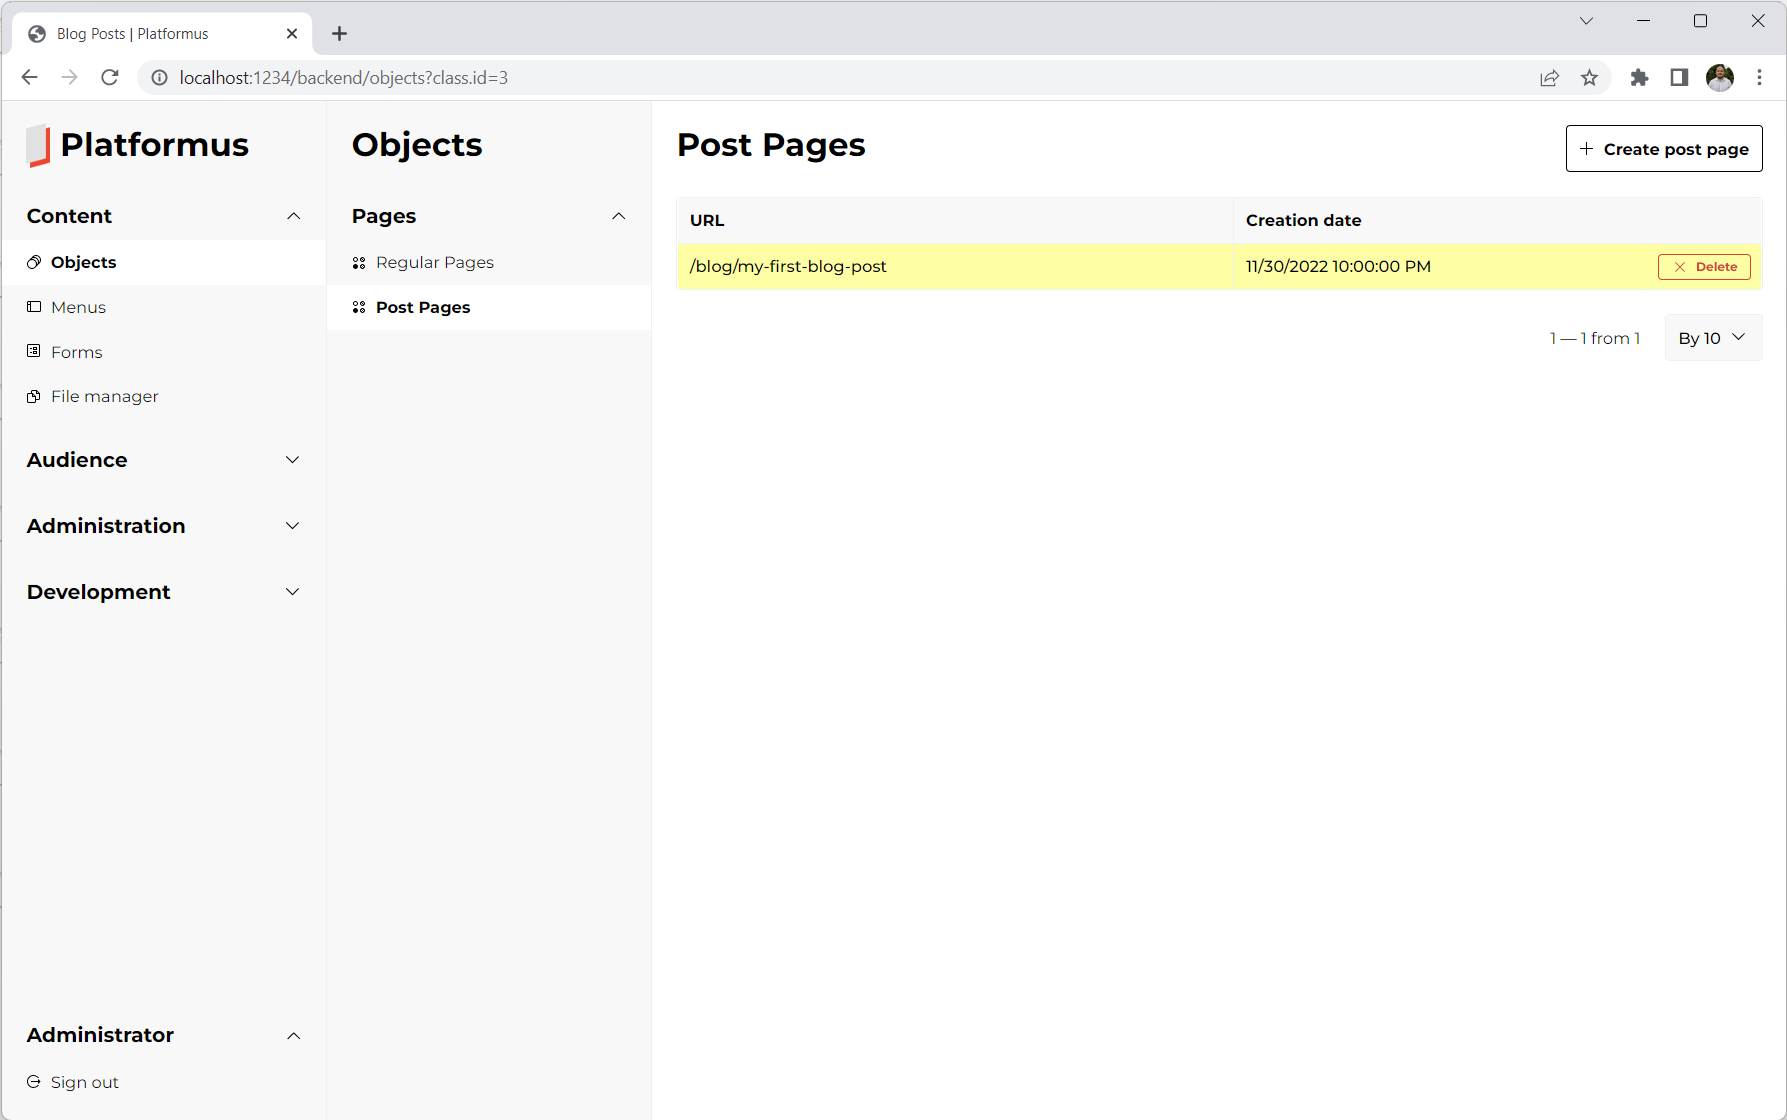
There are only the properties are displayed whose members have Is property visible in list checkbox checked.
Now we have our post page object created. We can use different ways to present it (view, API, plain text and so on), but now let’s use old good view for that.
Create PostPage.cshtml file inside the Views folder of the web application project with the following content:
@model dynamic
@{
  this.ViewBag.Title = this.Model.Page.Title;
  this.ViewBag.MetaKeywords = this.Model.Page.MetaKeywords;
  this.ViewBag.MetaDescription = this.Model.Page.MetaDescription;
}
<div class="post-page post">
  <h1>
    @Model.Page.Title
  </h1>
  <div class="post__cover">
    <img class="post__cover-image" src="@Model.Page.Image" alt="@Model.Page.Title" />
  </div>
  @Html.Raw(this.Model.Page.Content)
  <div class="post__created">
    @Model.Page.CreationDate
  </div>
</div>
The HTML ifself is very simple. You can see that all the data comes from the view model. There is the Page property
which contains all the properties of our post page object that we have described by the class members
(and property names are the same as the member codes). This Page property is created for us by the corresponding data source.
If your view needs more different data in order to be rendered, just add more data sources that will provide this data
to the view model.
Data sources specify the C# classes that implement the IDataProvider interface, you can create your own ones. They can provide data in any way you need: to load some objects, to take it from the web services (weather forecast?), or to return some hardcoded values. All the data sources that are used to process the particular request are grouped inside the endpoint. Endpoints process the requests and return response in Platformus-based web applications (as well as data sources, they specify C# classes that implement the IRequestProcessor interface, and you can create your own implementations). We will see how this all works a bit later in this article. You can still use regular C# controllers to process requests which is simple, but it is related to writing custom extensions and is not considered in this tutorial.
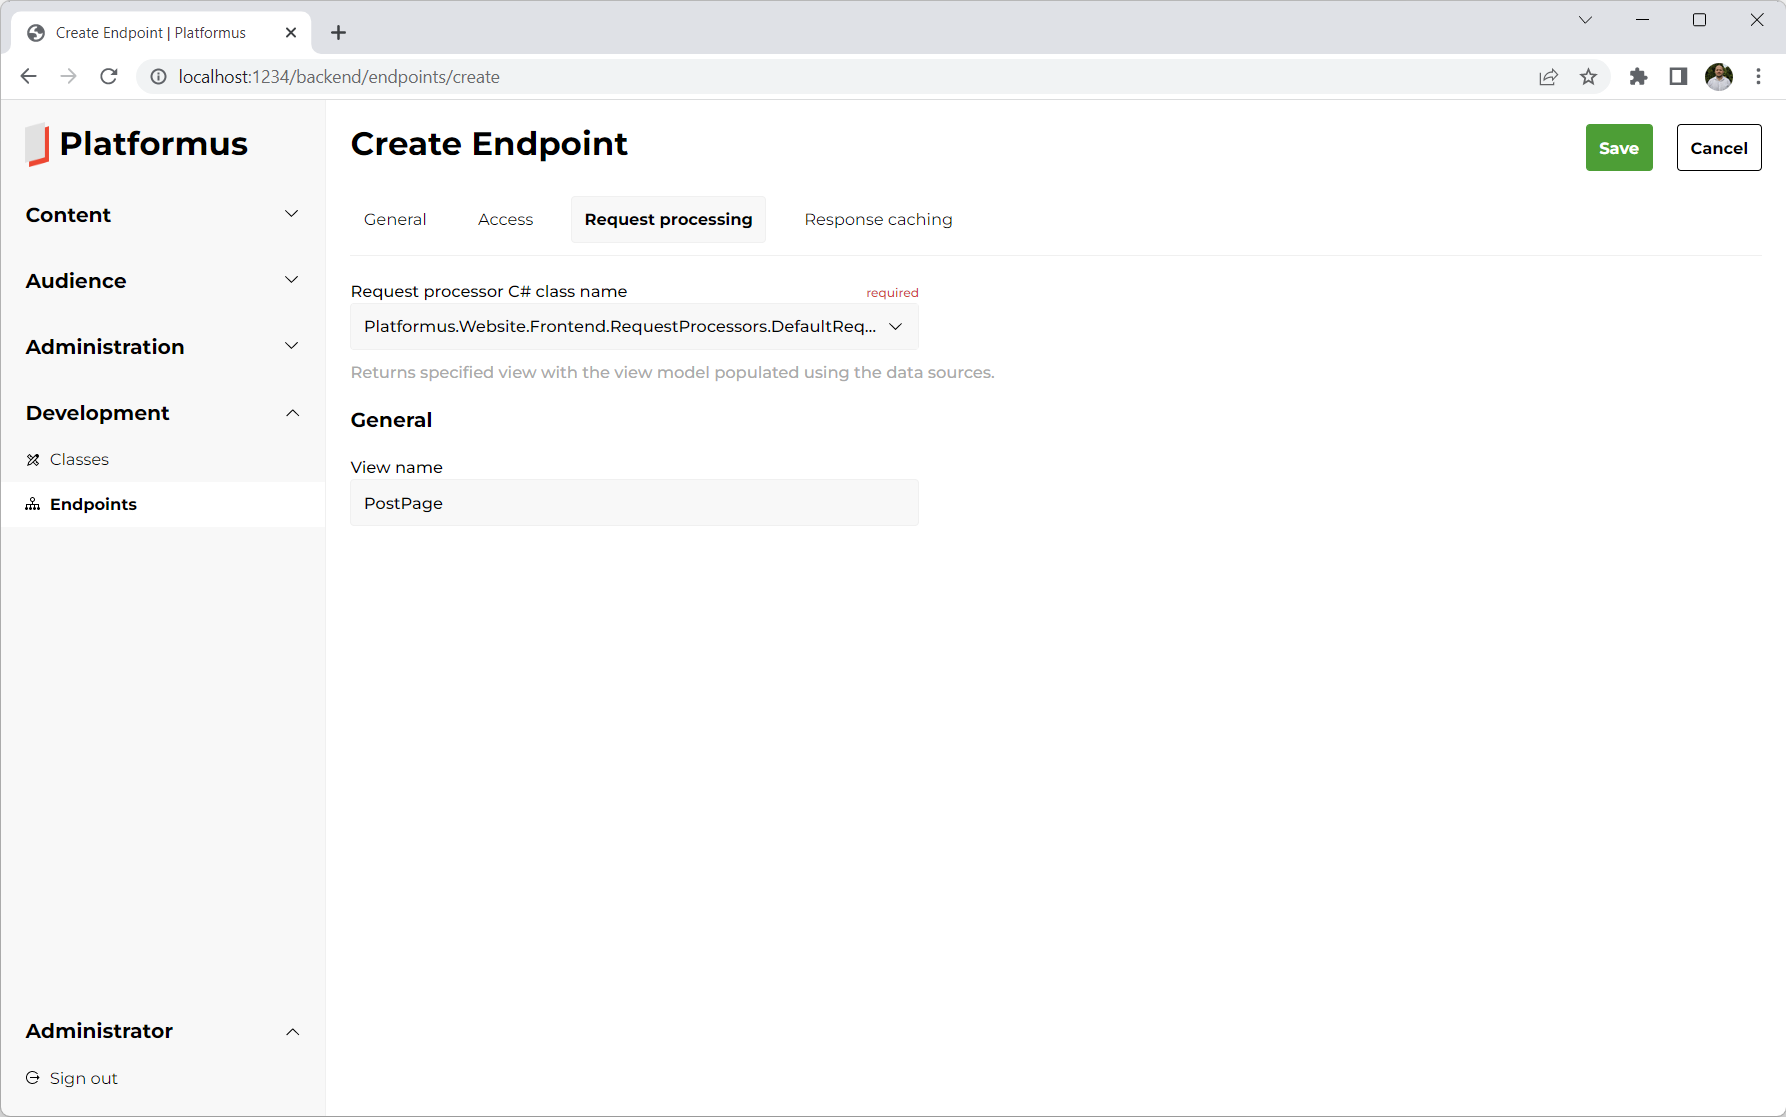
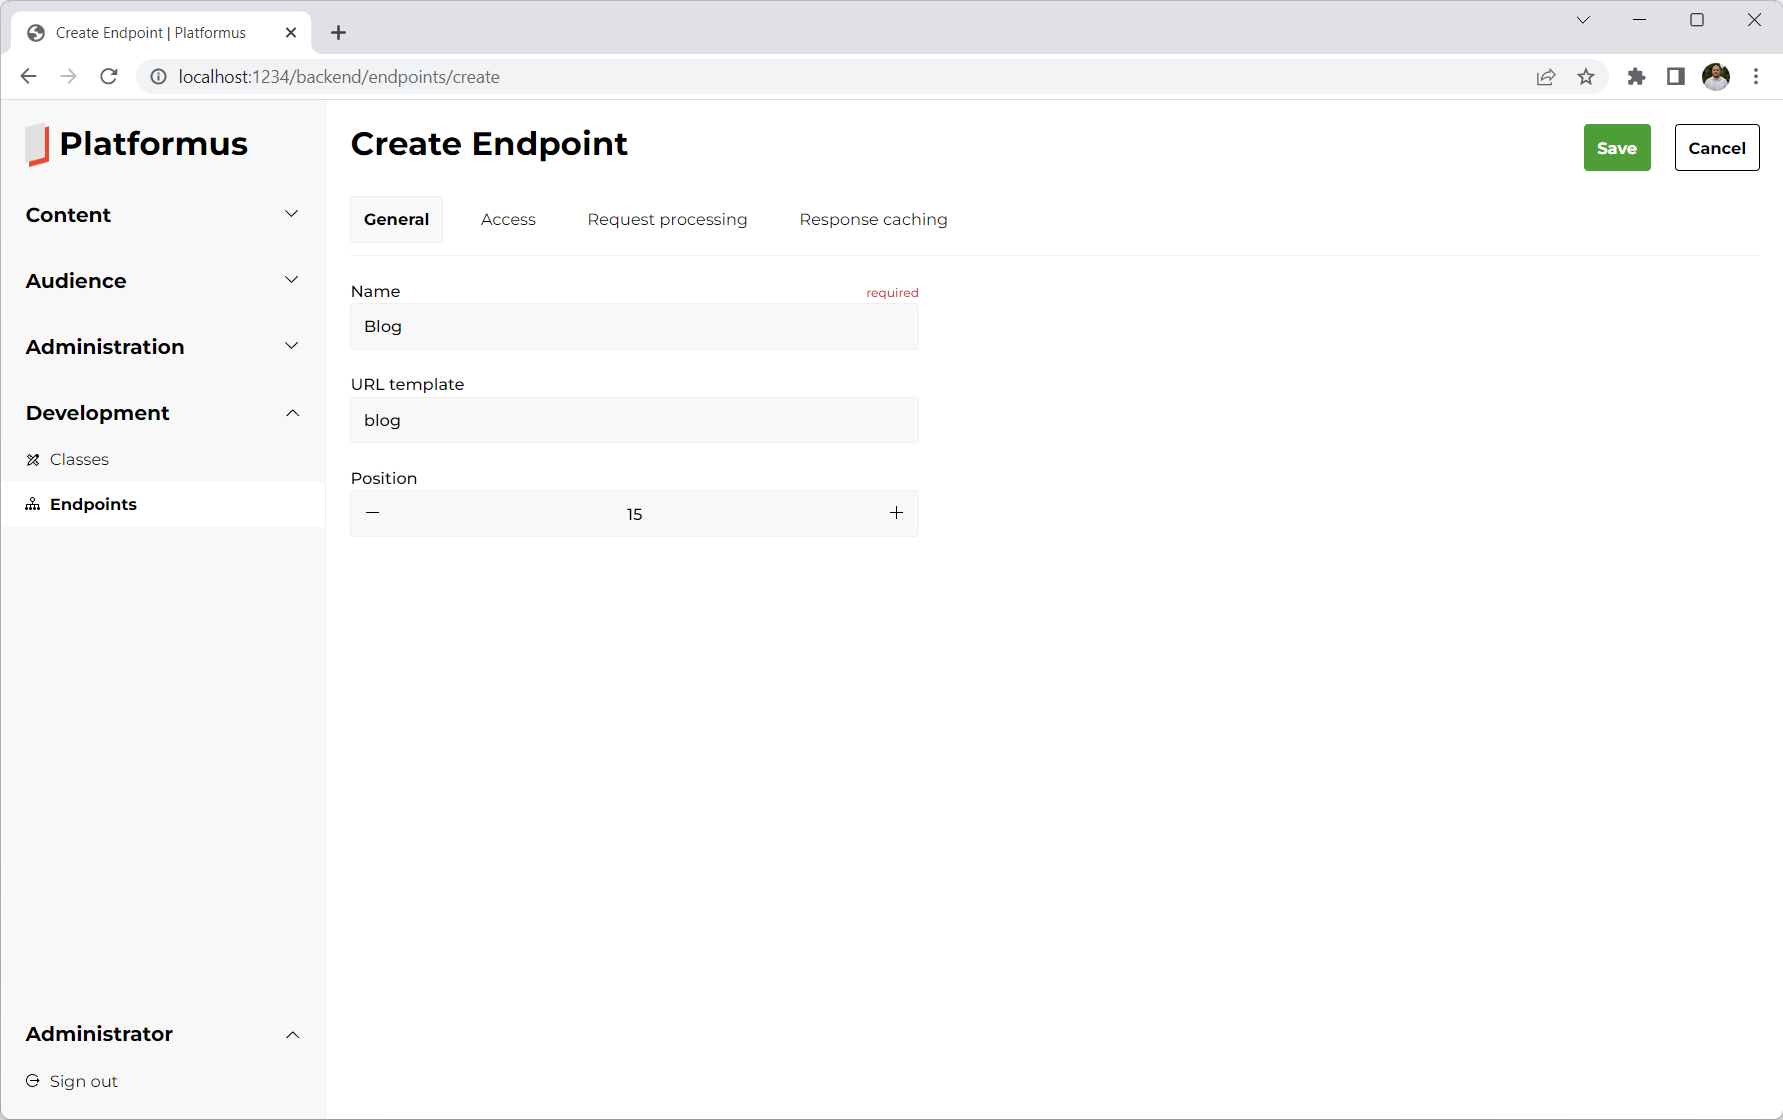
We have described and created the content (our post page object), we have also created the presentation for that content (our view). The last thing we must do to make it all work is to create the endpoint and the data source. Go to the Development/Endpoints section. Click the Create endpoint button and fill the fields as shown below:

Endpoints define how your Platformus-based web application processes the HTTP requests.
By default, if there are no endpoints (and regular C# controllers or pages) configured, you will have 404 response on every request. By specifying the URL template
for the endpoint, you tell the instance of the
IEndpointResolver
interface which endpoint it should use to process the particular request (you can use {*url} one to handle all the requests).
It is done the similar way as the MVC routes configuration (endpoint is something like route and controller at once;
endpoints support URL parameters too) and it is executed after the default MVC routing. Also, you can specify which C# class (implementation of the IRequestProcessor interface)
will process the request and return the result. You can write your own implementations of that interface and use them to process the requests.
Specify the view name that we have created earlier that will be used by this endpoint to render the response.
Click the Save button to create our new endpoint:
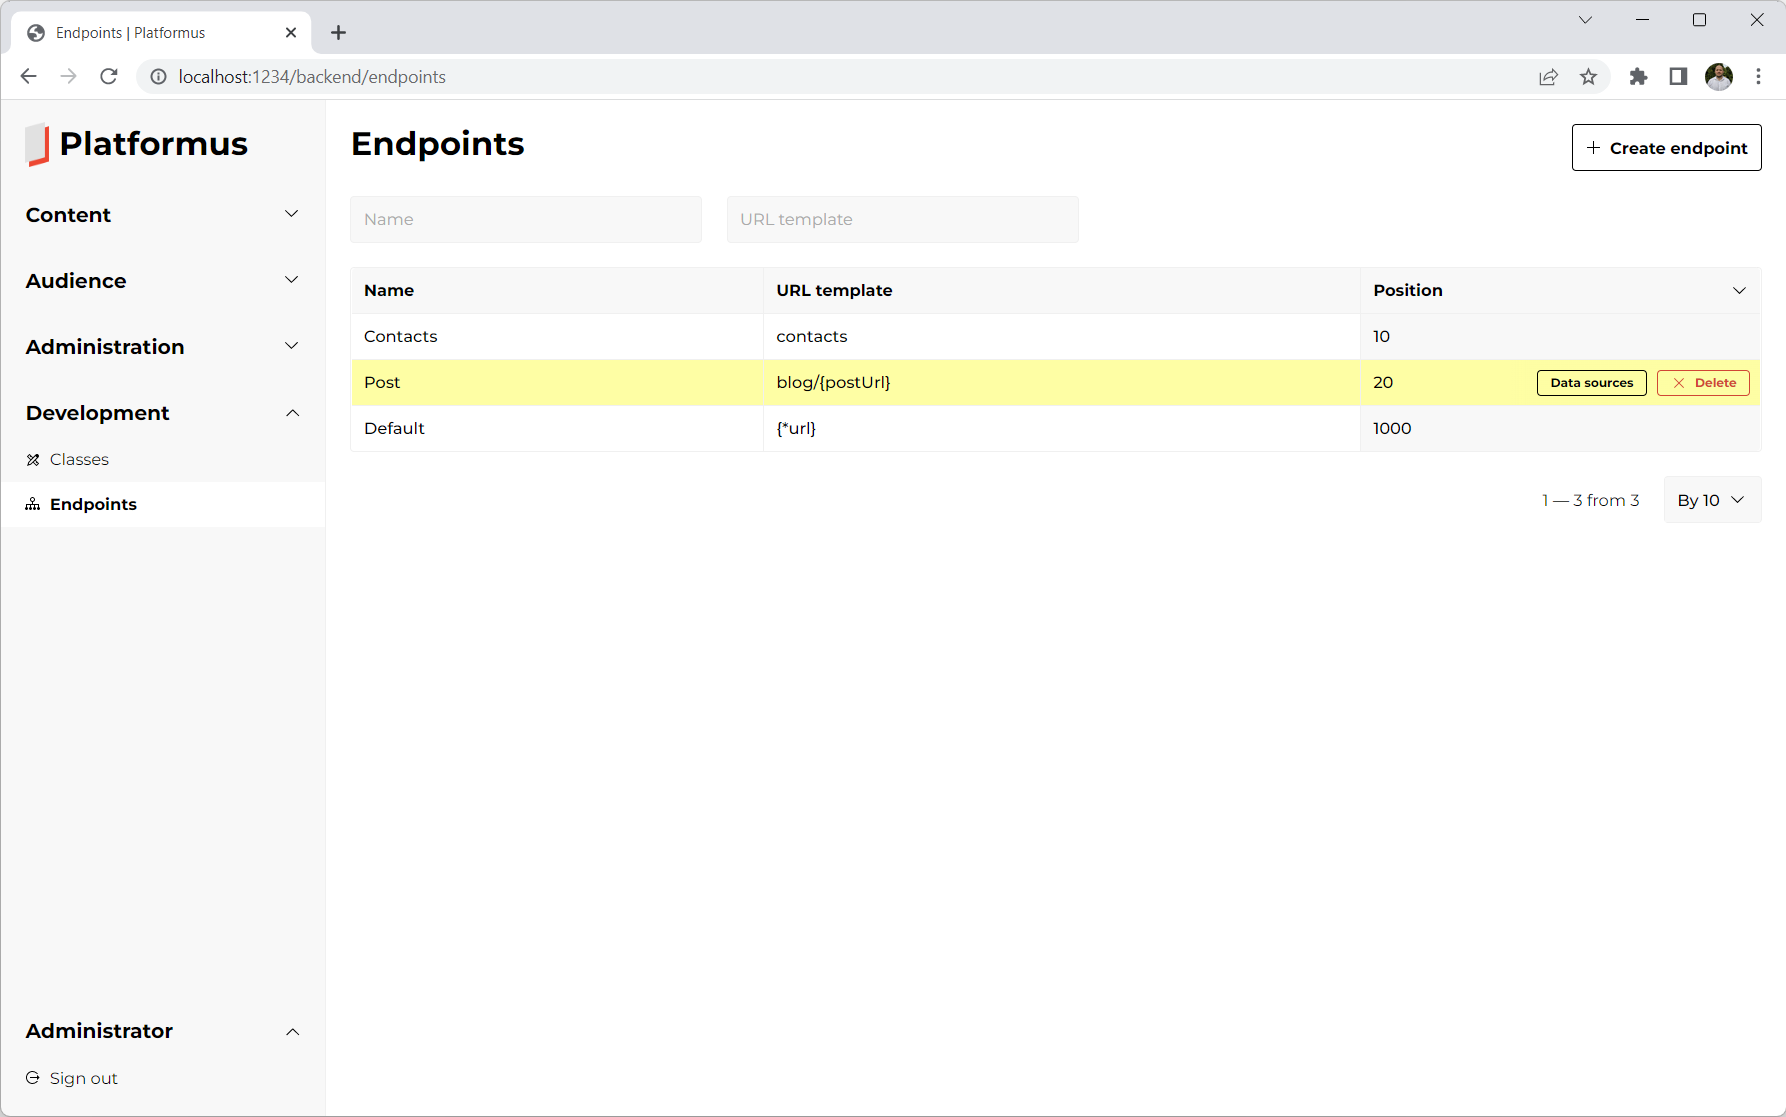
One more thing about the endpoints. Default implementation of the IEndpointResolver interface checks endpoints,
sorted by the position, one by one (whether the current one’s URL template matches the request’s URL or not).
That’s why position field value is important. If you have a few endpoints that match the given URL, the first one will be used.
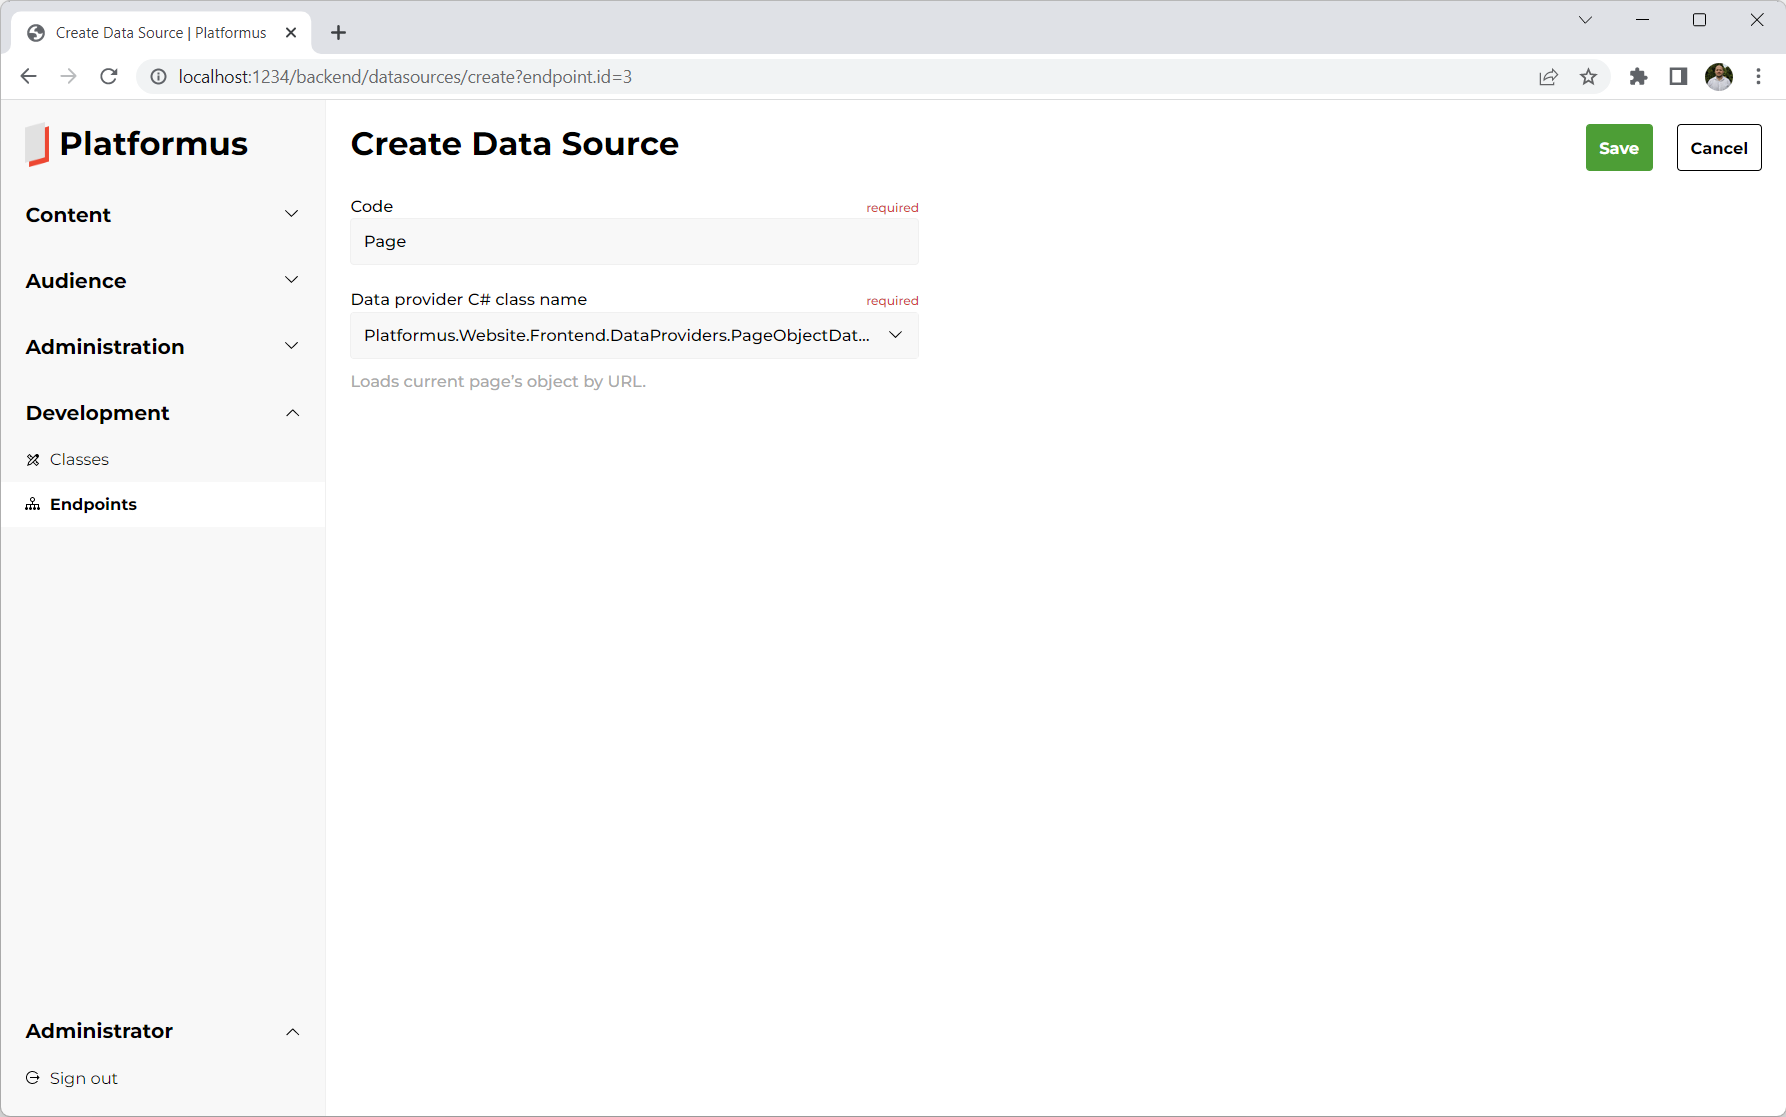
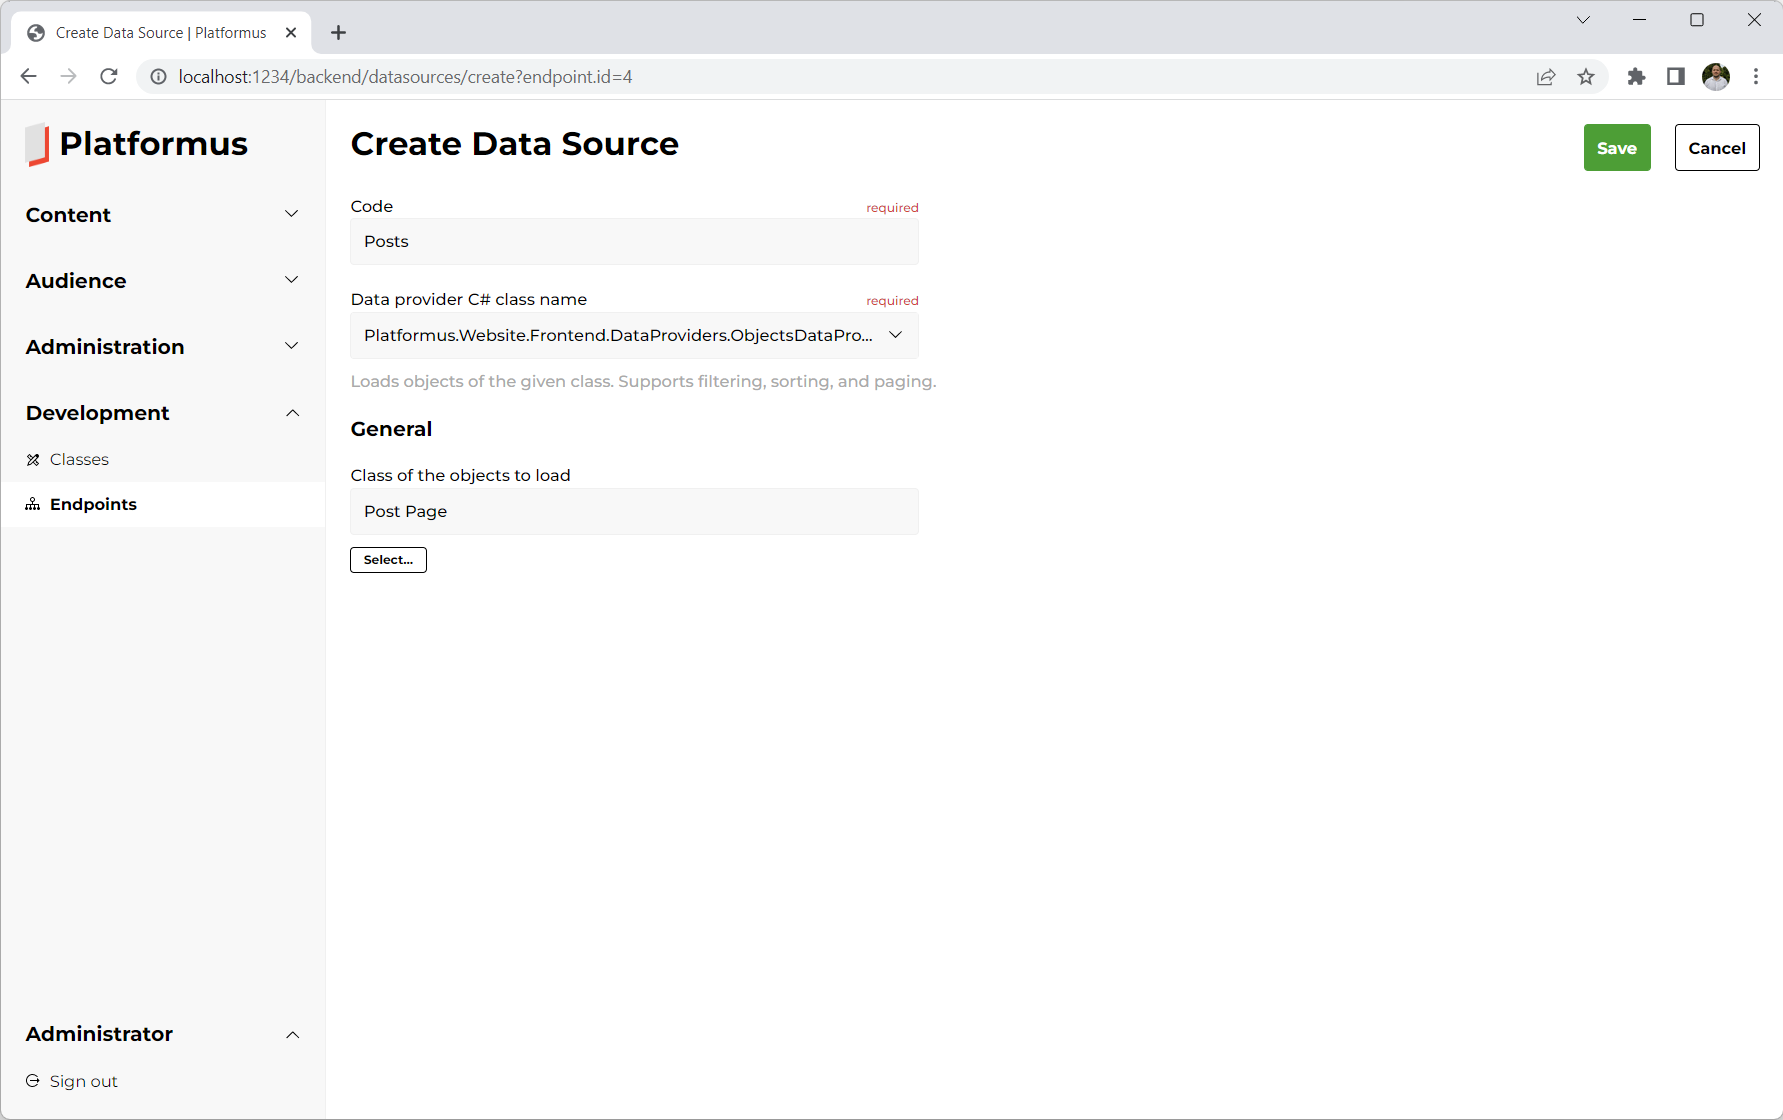
The last thing we have to do is to add the data source that will load the post page object by the value of the URL property
and assign it to the view model’s Page property (that will also be created). Click the Data sources link and then the
Create data source button. Fill all the fields as shown below and click the Save button:
That’s it. Now we can test how our post page is displayed. Navigate to https://localhost:5000/en/blog/my-first-blog-post:
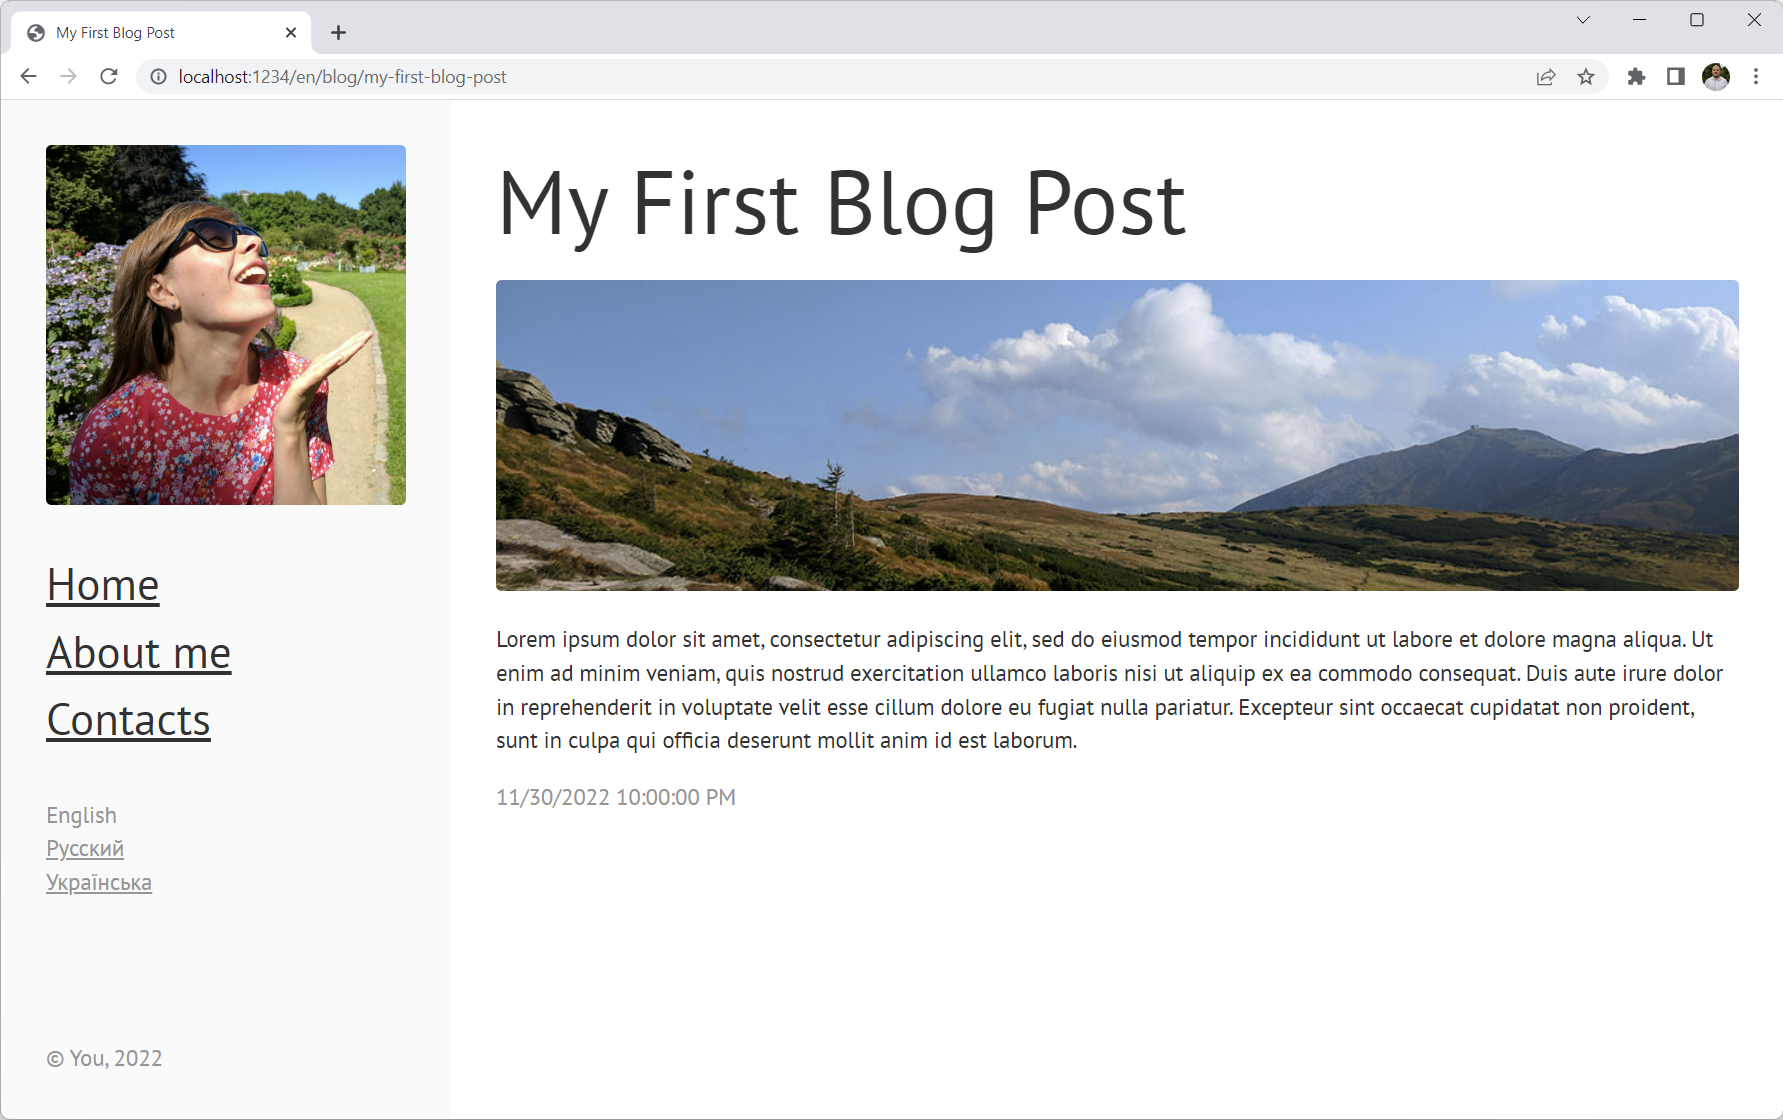
It works! But we also need to have a page with all the posts. We will make it quickly, because now you know enough.
This page will display the posts, so we don’t need to create any new class (just create the regular page object with
the URL property value set to /blog). All we need is to create new view, endpoint and two data sources for it.
Let’s start from the BlogPage.cshtml view:
@model dynamic
@{
  this.ViewBag.Title = this.Model.Page.Title;
  this.ViewBag.MetaKeywords = this.Model.Page.MetaKeywords;
  this.ViewBag.MetaDescription = this.Model.Page.MetaDescription;
}
@Html.Raw(this.Model.Page.Content)
<div class="blog">
  @foreach (var post in this.Model.Posts)
  {
    @Html.Partial("_Post", post as object)
  }
</div>
As you can see, we will have a data source that will provide the Posts view model property for us.
Also we have to create the _Post.cshtml partial view (inside the Shared folder):
@model dynamic
<div class="posts__post post">
  <h2>
    <a href="/@System.Globalization.CultureInfo.CurrentUICulture.TwoLetterISOLanguageName@Model.Url">@Model.Title</a>
  </h2>
  <div class="post__cover">
    <a href="/@System.Globalization.CultureInfo.CurrentUICulture.TwoLetterISOLanguageName@Model.Url">
      <img class="post__cover-image" src="@Model.Image" alt="@Model.Title" />
    </a>
  </div>
  @Html.Raw(this.Model.Preview)
  <div class="post__created">
    @Model.CreationDate
  </div>
</div>
Now create the new endpoint (you have to have the separated endpoint for each page template (or view)):

Because the page that will display the list of the posts is the page too, add the Page data source for
our new endpoint (the same way we have done that for the previous one). It will load our regular page object that holds
Content and other properties of this page.
But in order to be able to display the posts on this page, we must add one more data source:
As you can see, another C# class is selected as data provider for this data source. It provides more properties for us. For example, it allows to specify the class of the objects to load etc.
Everything is done. Now you can navigate to https://localhost:5000/en/blog and see the result:
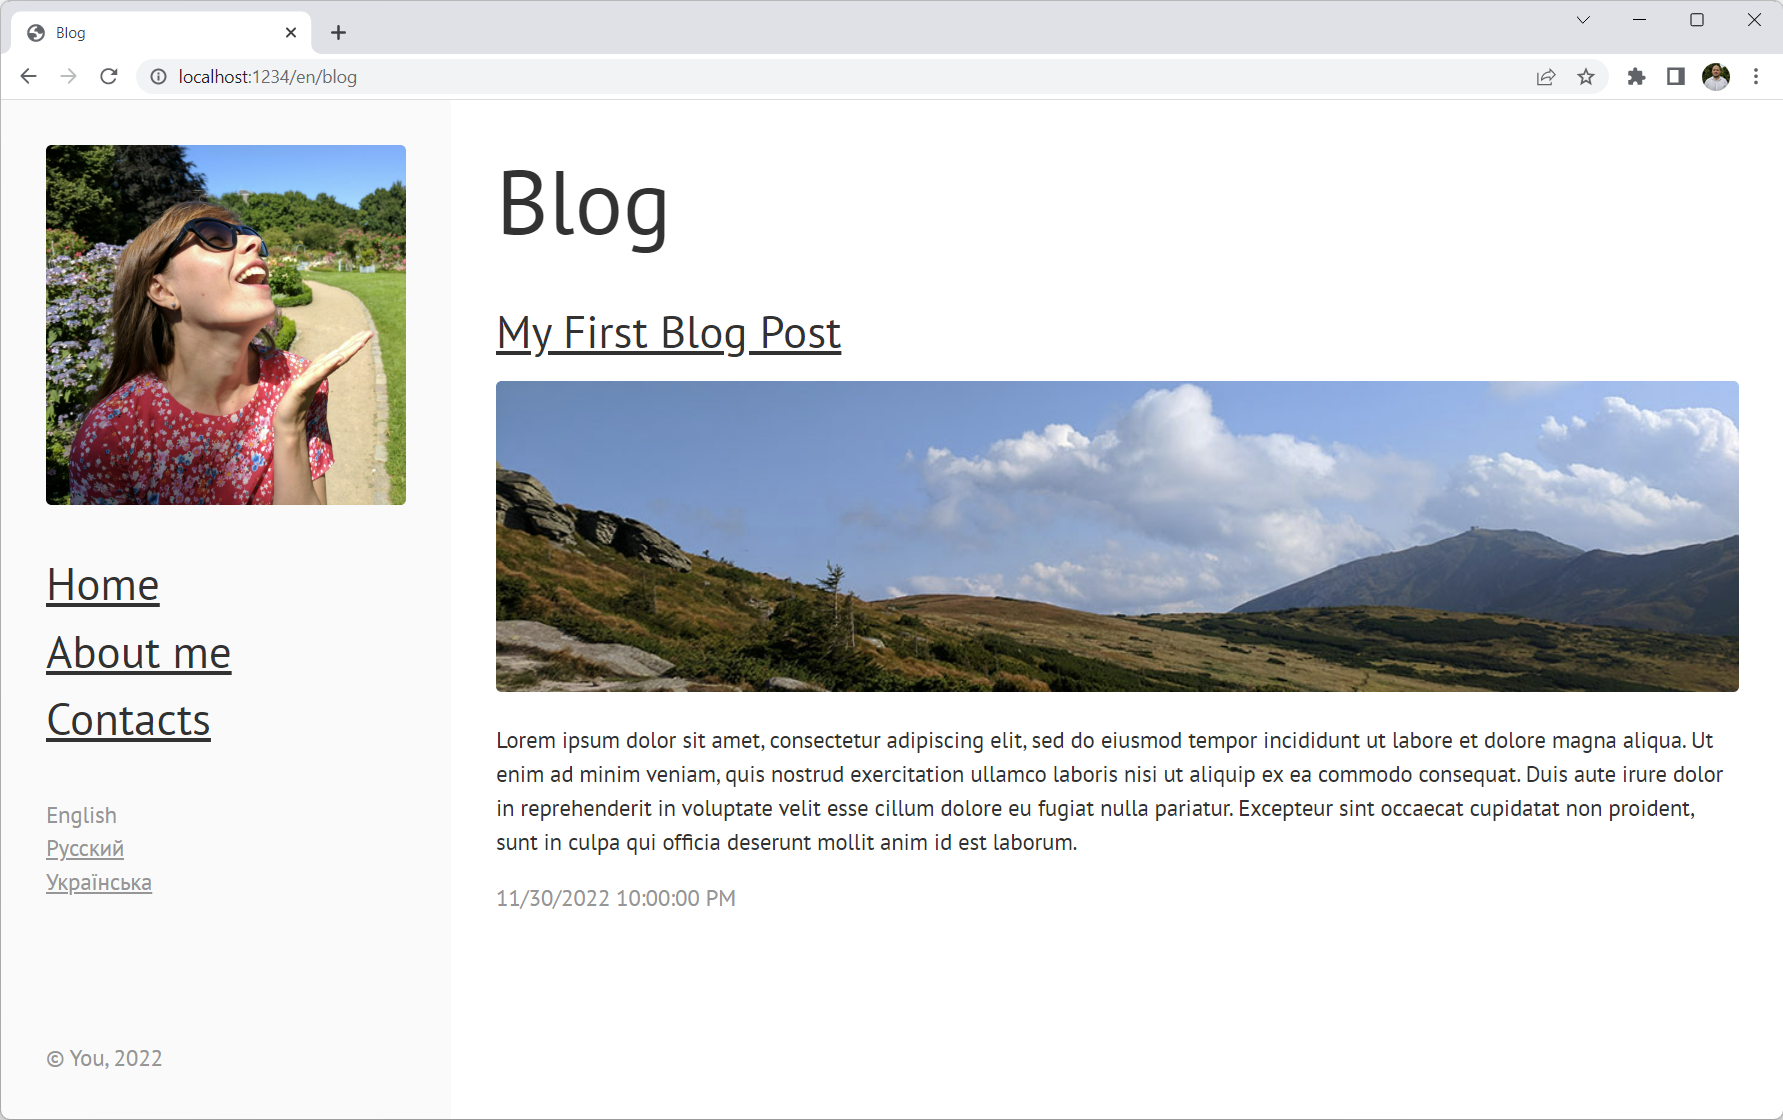
Click the image to go to the post page. You can add the new menu item in the menu to have your blog there.